
In industrial process automation, engineers spend massive amounts of capital ensuring the reliability of their Distributed Control Systems (DCS), specifying high-grade pneumatic actuators, and selecting premium control valves. Yet, one of the most common causes of signal failure and process downtime comes down to a component that costs only a few dollars: the metal mounting bracket connecting the limit switch box to the actuator.
When this mechanical bridge fails, the electrical feedback fails with it. A loose bracket causes the valve position monitor to shift out of alignment. The DCS begins receiving jittery signals, false position readings, or no signal at all, triggering unnecessary process interlocks.
At Zhejiang KGSY Intelligent Technology Co., Ltd., we have analyzed countless field failures across the chemical, power, and water treatment sectors. In almost every case of mechanical disconnect, the root cause was not a faulty limit switch, but compromised mounting hardware. This article provides a comprehensive engineering guide to understanding why actuator brackets come loose and how to execute a permanent, vibration-proof field fix.
1. The Anatomy of the Connection: The NAMUR Standard
To understand the failure, you must understand the standard. The global benchmark for mounting accessories to quarter-turn pneumatic actuators is VDI/VDE 3845, commonly known as the NAMUR standard.
This standard dictates a specific geometric relationship. The top pinion of the pneumatic actuator features a slotted drive shaft. The limit switch box is equipped with a matching flat-blade lower shaft. The bracket acts as the rigid bridge, elevating the limit switch box to the exact height required for these two shafts to interlock perfectly.
The bracket is typically secured to the actuator using four M5 or M6 metric bolts, and the limit switch box is secured to the top of the bracket using four similarly sized bolts. When installed correctly, the valve, actuator, and limit switch box move together as a single, unified, solid-state mechanical assembly.
2. Why Do Brackets Come Loose? The Root Causes
Steel bolts threaded into metal housings do not unscrew themselves without external forces. If a bracket is loose, it is succumbing to one or more of the following environmental stresses:
High-Frequency Pipeline Vibration
This is the number one enemy of mechanical fasteners. Pumps, cavitating fluids, and nearby heavy machinery send constant, high-frequency kinetic energy through the pipeline. Over time, this micro-vibration overcomes the friction between the bolt threads and the actuator housing, causing the bolts to slowly back out.
Pneumatic Shock and Water Hammer
Unlike continuous vibration, pneumatic shock is a sudden, violent event. When an automated valve is commanded to open or close rapidly (especially Emergency Shutdown Valves), the sudden physical stop at the end of the stroke sends a heavy shockwave up through the actuator. Similarly, “water hammer” inside the pipe transfers massive kinetic energy to the valve body. Repeated slamming acts like an invisible hammer tapping on your bracket bolts.
Thermal Cycling (Expansion and Contraction)
Many valves operate outdoors or handle high-temperature media. As the environment heats up during the day and cools at night, or as hot steam enters a cold pipe, the metals expand and contract. If the bracket is made of a dissimilar metal to the actuator body (e.g., carbon steel on an aluminum housing), they expand at different rates. This differential movement degrades the clamping force of the bolts over time.
Poor Installation Practices
Often, the simplest explanation is the correct one. During initial commissioning, technicians in a rush may reuse old, stretched bolts, fail to install lock washers, or fail to torque the bolts to the manufacturer’s specified rating. A bolt installed “finger tight” plus a quick turn of a wrench will not survive an industrial environment.
3. The Danger of a Loose Bracket: Diagnosing the Symptoms
A loose bracket manifests in the control room as electrical anomalies. If your maintenance team observes the following, the bracket is the prime suspect:
- Intermittent Signal Loss: The limit switch box physically lifts away from the actuator, causing the NAMUR shaft to pop out of the slot. The valve turns, but the switch does not.
- The “Double Stroke” Reading: As the actuator turns, the loose switch box rotates with it slightly before the internal shaft catches. The DCS sees a delay in the limit switch actuation, or a signal that blinks on and off as the loose box shakes.
- Sheared Internal Shafts: If the bracket is loose but the NAMUR shaft is still partially engaged, the shaft sits at a harsh, incorrect angle. When the powerful pneumatic actuator turns, the immense lateral torque can cleanly snap the internal shaft of the limit switch box, destroying the unit.
4. The Step-by-Step Field Fix: The Triple-Lock Method
When fixing a loose bracket, simply tightening the existing bolts with an Allen key is a temporary band-aid. The vibration that loosened them once will loosen them again. You must upgrade the fastening methodology.
Step 1: Safety and LOTO
Before placing hands on the actuator, observe complete Lockout/Tagout (LOTO) procedures. Isolate the pneumatic air supply so the actuator cannot unexpectedly stroke, and isolate the electrical power to the limit switch box.
Step 2: Disassembly and Inspection
Completely remove the four bolts holding the limit switch box to the bracket, and the four bolts holding the bracket to the actuator.
- Inspect the NAMUR slot on the actuator and the flat shaft on the limit switch box. If the edges are rounded off or chewed up from spinning loosely, the limit switch box must be replaced.
- Discard the old bolts and washers. Thread fatigue makes reused hardware unreliable.
Step 3: Specify the Right Hardware
Do not use standard flat washers. You must establish mechanical resistance against backing out.
- Star Washers (Toothed Lock Washers): These are far superior to standard split-ring lock washers for high-vibration environments. The teeth bite into both the bolt head and the bracket metal, creating a physical barrier to rotation.
- Use high-tensile stainless steel metric bolts (usually A2 or A4 grade).
Step 4: The Triple-Lock Installation
- Clean the Threads: Wipe the threaded holes on the actuator with a fast-drying solvent to remove old grease or debris.
- Apply Threadlocker: Apply a drop of medium-strength, removable liquid threadlocker (such as Loctite Blue 242) to the bottom threads of the new bolts. This liquid cures into a hard plastic in the absence of air, filling the microscopic gaps between the threads and permanently locking them against vibration. (Avoid permanent red threadlocker, as it requires a blowtorch to remove during future maintenance).
- Torque to Spec: Align the bracket perfectly parallel to the actuator. Insert the bolts with the star washers. Tighten them in a cross-pattern (diagonal sequence) to ensure even clamping force. Finally, use a calibrated torque wrench to achieve the precise torque value recommended by the actuator manufacturer.
5. Engineering a Permanent Solution: The KGSY Advantage
The ultimate defense against bracket failure is specifying superior materials from the very beginning of the project. Flimsy, stamped carbon-steel brackets or brittle plastic brackets flex under load, amplifying vibration rather than resisting it.
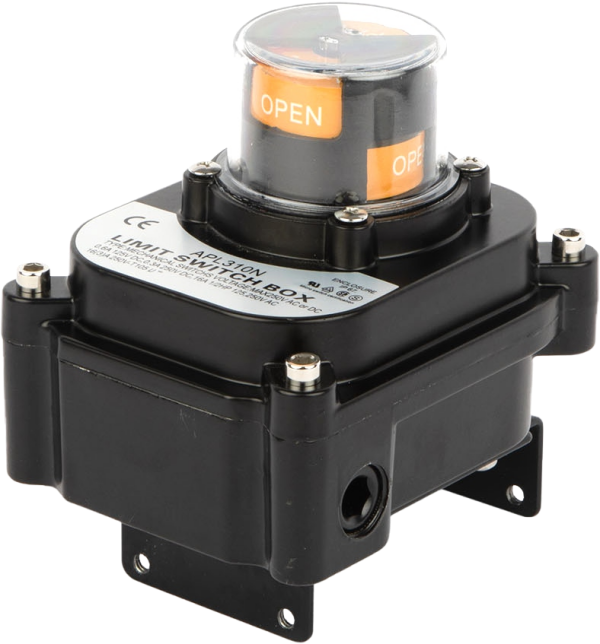
Zhejiang KGSY Intelligent Technology Co., Ltd. engineers the mounting hardware for our APL, KG800, and FC800 series limit switch boxes with the same rigorous standards as the electronic internals. We supply heavy-gauge, laser-cut 304 or 316 Stainless Steel NAMUR brackets. These rigid, structurally folded brackets absorb high-frequency pipeline vibration without flexing.
By combining rigid stainless steel architecture, captive mounting hardware, and proper field installation techniques utilizing threadlockers and star washers, engineers can completely eliminate mechanical disconnects. The connection between your valve and your DCS should be absolute; with the right hardware and procedures, it will be.
Post time: Apr-15-2026

